Building a Raspberry Pi Web Server
I’ve been looking into getting an Arduino or a Raspberry Pi for quite a while, but I was never able to commit myself to purchasing either. Well this past Christmas I received an Amazon gift card, but had no idea what to spend it on. So I finally gave in and bought a Raspberry Pi.
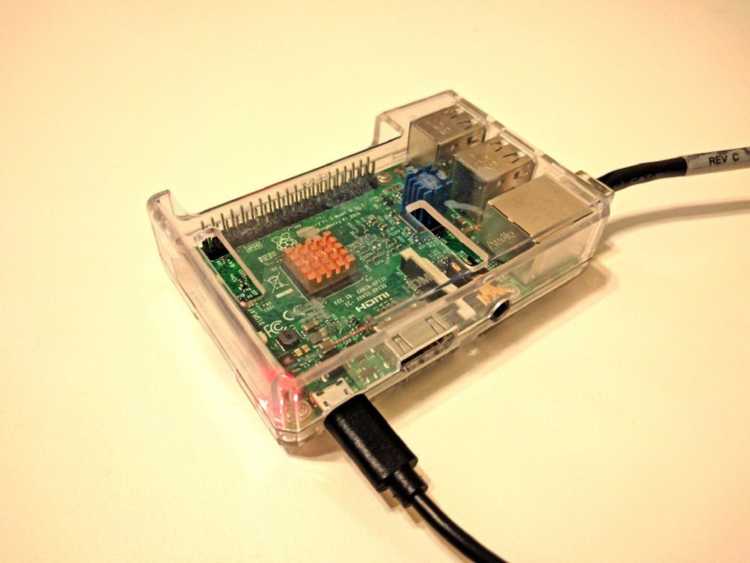
Along with the Pi, I bought a starter prototyping kit that came with a breadboard, LEDs, motors, buttons, potentiometers, and lots of other little gadgets. I’ve been uploading the code for that project here on Github and I may write a more in depth article about it at a later time. I do have to admit, I’m really enjoying tinkering around with the Pi— it’s a powerful little computer with a lot of potential and there are many ways to take advantage of it.
But I digress. We are here today to talk about how to setup a local web server on the Pi. While, this is not meant to be a how-to guide, but a catalog of the process I went through, I do hope it will help inspire newcomers to the Raspberry Pi. I will be detailing the steps I went through to setup an Apache and a MySQL server on the Raspberry Pi and how I configured the Pi to host a Wordpress site on my local network.
My initial reasoning for doing this was to see how viable it is to use the Pi as a local development and testing bed for various projects. Ultimately I would like to determine the ease of setting up multiple environments (i.e. Node.js, MongoDB, Laravel, SQL, etc), all packaged into a SD card image, which then can be swapped out, and shared with others.
- Raspberry Pi 3 Model B
- 4gb Micro SD card (class 4)*
- Micro SD to USB card adapter
- USB Keyboard*
- HDMI monitor and cable*
Note 1: I used a 4gb class 4 Micro SD card as a benchmark to gauge Apache and MySQL performance on a slower storage. Although I have not noticed any issues on a fresh install of Wordpress, I would recommend at minimum using a 8gb class 10 card. Or better yet, the usage of a external storage device is highly recommended, as running a server on a SD card could shorten its life.
Note 2: The USB Keyboard and HDMI cable were only used to update passwords and enable SSH access to the Pi. All other steps were done via SSH through an external workstation.
Due to the limited size of my SD card, I flashed an image for Raspbian Lite. Raspbian Lite is a lightweight operating system for the Raspberry Pi which does not include extra software or a graphical desktop UI. There are many other OS you can install including versions of Ubuntu and Windows. I will not go into detail on flashing the SD card because official directions can be found here: https://www.raspberrypi.org/documentation/installation/installing-images/README.md
After the Micro SD card has been flashed and loaded, connect the Raspberry Pi to a keyboard and HDMI monitor and boot it up. When ready, access the configuration in the terminal by typing:
$ sudo raspi-configIt should prompt for a password, which by default is raspberry. This will launch the Configuration Tool.
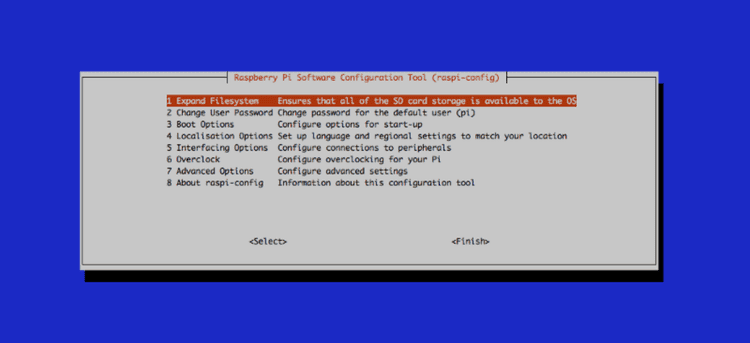
First step is to change the default user password. Select Change User Password and follow the onscreen direction to update the password.
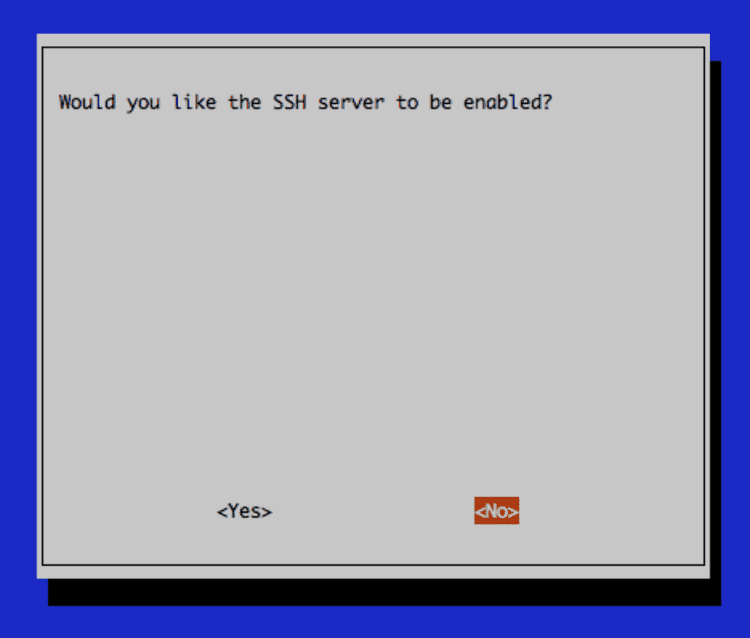
Second we want to enable SSH access. On the configuration tool menu choose Interfacing Options then select SSH to open a prompt to enable the SSH server. Once the SSH server is enabled, we no longer need a monitor or keyboard connected to the Raspberry Pi. We are now able to remotely configure and control the Pi, using a SSH client on a different computer.
Linux and Mac machines should have a SSH client built in. For working on a Windows computers, a program such as PuTTY will allow you to connect to the Pi via SSH.
Final step is to retrieve the MAC address. The MAC address will come in handy when we configure our internet router later on.
If the Pi is connected via ethernet we retrieve the MAC address by:
$ cat /sys/class/net/eth0/addressIf the Pi is connected via wireless we use:
$ cat /sys/class/net/wlan0/addressRouters typically use Dynamic Host Configuration Protocol to assign a dynamic internal IP address to connected devices. This internal IP address is separate from the public IP address provided by the ISP. The DHCP IP is meant to help the router identify the various devices that are connected to it.
Due to DHCP, the Raspberry Pi may have a different internal IP address every time it connects to the router through ethernet or wifi. This can pose a problem, when running a local web server, because we want all of our local domain addresses to always point to the same IP address. Since we do not want to look up the Pi’s IP address every time the router assigns a new one, we will manually reserve an IP address just for the Raspberry Pi
The steps for reserving an IP will vary by the manufacturer and model of the router, but each brand should provide directions on their website or manual. Typically we will need the MAC address of the Raspberry Pi to tell the router which device we should reserve the IP for. On my router, I have reserved the IP Address192.168.1.97 for the Pi.
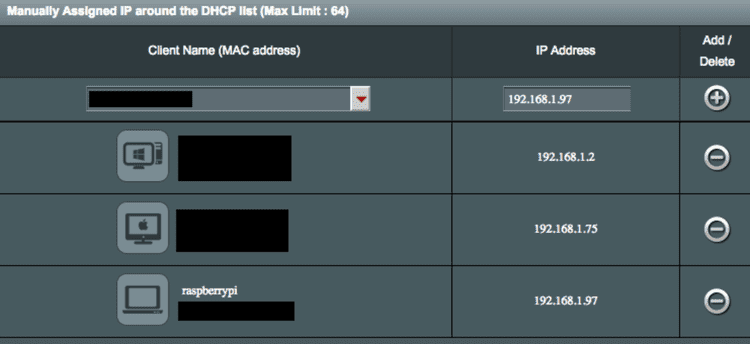
Online guides to reserving IP Address for some popular brands.
If everything was setup correctly, we should now be able to connect to our Raspberry Pi via SSH. We will connect to the IP address 192.186.1.97 using the username pi.
$ ssh pi@192.168.1.97It should ask for a password and subsequently show a welcome screen. We are now remotely connected to our Raspberry Pi!
Let’s summarize what we have done so far.
- Flashed the Raspbian OS image onto our Micro SD card
- Updated default password, and configured SSH access
- Reserved a DHCP IP address for the Raspberry Pi in our router
- Remotely connected to the Pi using a SSH client.
Now we are ready to install required software and setup the Pi to host and run Wordpress.
Before we start, we should update and upgrade our packages. This will make sure we have the latest software updates and the most recent repositories.
First we run update to retrieve the latest info on installed and available packages. Then we run upgrade to download the latest versions of installed package.
$ sudo apt-get update
$ sudo apt-get upgrade
Once this is complete we can move on to installing Apache
To install Apache we use:
$ sudo apt-get install apache2Once this is completed, we can visit a test webpage on our Raspberry Pi by typing its IP address into a browser http://192.168.1.97
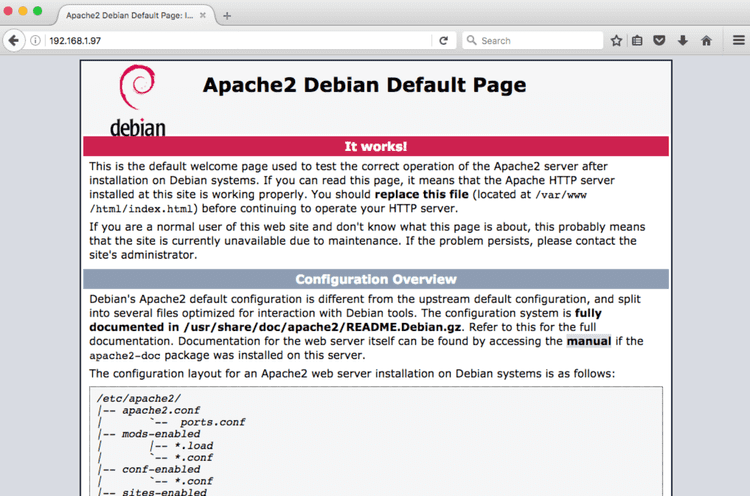
The test page above is located within /var/www/html/index.html By default all of the websites files are stored in the /var/www directory and this is where we will store our Wordpress site. But before we do that we will need to install PHP and MySQL.
To install PHP and PHP modules for Apache:
$ sudo apt-get install php5 libapache2-mod-php5To test our installation we can type in $ php -v which should print out the following or similar message.
PHP 5.6.29-0+deb8u1 (cli) (built: Dec 17 2016 06:04:43)
Copyright (c) 1997-2016 The PHP Group
Zend Engine v2.6.0, Copyright (c) 1998-2016 Zend TechnologiesNow we install the MySQL server and related PHP modules:
$ sudo apt-get install mysql-server mysql-client php5-mysqlDuring the installation process, we will be asked to set the root password for the MySQL server. Once the installation is complete, we can verify that MySQL was installed correctly by logging on the console by:
$ sudo mysql -u root -pThis will prompt for the password we created during the installation. Once logged in, we should be connected to the MySQL server.
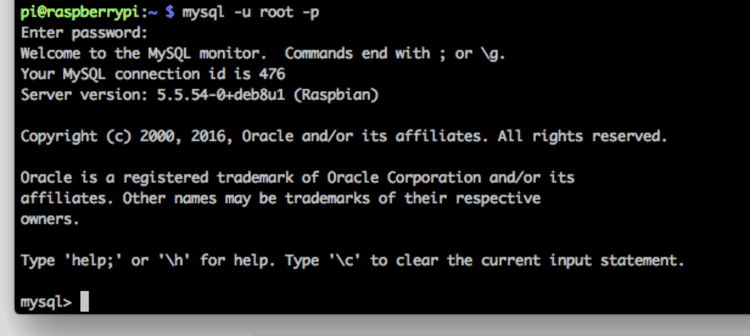
Now we have everything set up to begin installing Wordpress.
For this step, we will be downloading Wordpress, creating the database, configuring the Apache virtual host, and updating our hosts file on external devices to allow them to access our website.
To begin we will first create a directory for our site within /var/www called wordpress.pi/ This name will also be used as our domain name and the name for our server configuration file, which we will create later.
$ cd /var/www
$ sudo mkdir wordpress.pi
Now switch to the wordpress.pi directory and download Wordpress using curl At the time this article was written, the current version of Wordpress was 4.7.2
$ cd wordpress.pi/
$ sudo curl -o latest.tar.gz https://wordpress.org/latest.tar.gz
Extract the file, and rename the extracted wordpress/ directory to public_html/ and then delete the downloaded file.
$ sudo tar -xzf latest.tar.gz
$ sudo mv wordpress/ public_html/
$ sudo rm latest.tar.gz
We now have a directory called public_html which holds all of the contents of our Wordpress site.
$ ls -la /var/www/wordpress.pi/public_html/
total 196
drwxr-xr-x  5 nobody nogroup  4096 Jan 26 18:21 .
drwxr-xr-x  3 root   root     4096 Jan 29 17:18 ..
-rw-r--r--  1 nobody nogroup   418 Sep 25  2013 index.php
-rw-r--r--  1 nobody nogroup 19935 Jan  2 18:51 license.txt
-rw-r--r--  1 nobody nogroup  7433 Jan 11 17:46 readme.html
-rw-r--r--  1 nobody nogroup  5447 Sep 27 21:36 wp-activate.php
drwxr-xr-x  9 nobody nogroup  4096 Jan 26 18:21 wp-admin
-rw-r--r--  1 nobody nogroup   364 Dec 19  2015 wp-blog-header.php
-rw-r--r--  1 nobody nogroup  1627 Aug 29 12:00 wp-comments-post.php
-rw-r--r--  1 nobody nogroup  2853 Dec 16  2015 wp-config-sample.php
drwxr-xr-x  4 nobody nogroup  4096 Jan 26 18:21 wp-content
-rw-r--r--  1 nobody nogroup  3286 May 24  2015 wp-cron.php
drwxr-xr-x 18 nobody nogroup 12288 Jan 26 18:21 wp-includes
-rw-r--r--  1 nobody nogroup  2422 Nov 21 02:46 wp-links-opml.php
-rw-r--r--  1 nobody nogroup  3301 Oct 25 03:15 wp-load.php
-rw-r--r--  1 nobody nogroup 33939 Nov 21 02:46 wp-login.php
-rw-r--r--  1 nobody nogroup  8048 Jan 11 05:15 wp-mail.php
-rw-r--r--  1 nobody nogroup 16250 Nov 29 05:39 wp-settings.php
-rw-r--r--  1 nobody nogroup 29896 Oct 19 04:47 wp-signup.php
-rw-r--r--  1 nobody nogroup  4513 Oct 14 19:39 wp-trackback.php
-rw-r--r--  1 nobody nogroup  3065 Aug 31 16:31 xmlrpc.php
Before we continue, we will need to fix the permission for all of the files and folder inside public_html so that the Apache user can access and modify them. To do this, we use:
$ sudo chown -R www-data:pi /var/www/wordpress.pi/public_html/Log into MySQL using:
$ mysql -u root -pOnce connected, we will create a database named wordpress using the following command:
create database wordpress;
Finally, close the connection to the MySQL server by typing exit in the prompt. We now have a database that will be used to store our Wordpress site data.
Virtual hosts are configuration files for our website. We will use it to let Apache know how to handle and respond to domain requests. Virtual hosts are stored within the /etc/apache2/sites-available/ directory. There is a default configuration file which we will use as a template for our Wordpress site’s virtual host.
First we duplicate the default configuration file, into a new file called wordpress.pi.conf. It is a good idea to keep the same naming scheme for all of our websites directory and virtual host config file.
$ cd /etc/apache2/sites-available/
$ sudo cp 000-default.conf wordpress.pi.conf
We will now edit the new configuration file we just created:
$ sudo nano wordpress.pi.confFirst, we will change the ServerName to wordpress.pi and add a ServerAlias for www.wordpress.pi Second, we will update the DocumentRoot to point to our public_html folder in /var/www/wordpress.pi/public_html
<VirtualHost *:80>
 ...
 ServerName wordpress.pi
 ServerAlias www.wordpress.pi
 ServerAdmin webmaster@localhost
 DocumentRoot /var/www/wordpress.pi/public_html
...
</VirtualHost>
The ServerName and ServerAlias directive establishes which domains should match out virtual host configuration, and DocumentRoot directive points to the root of our domain. So trying to access http://wordpress.pi or http://www.wordpress.pi on the web server will serve up the files located in /var/www/wordpress.pi/public_html
Finally, we will need to enable the new virtual host configuration file and restart Apache.
$ sudo a2ensite wordpress.pi.conf
$ sudo service apache2 restartNow that we have our server configuration completed, we need to configure our remote machine to point to the Raspberry Pi whenever we try to access the domainshttp://wordpress.pi or http://www.wordpress.pi. We do this by mapping the domain to the IP address of the Raspberry Pi in our hosts file.
Locations of hosts file vary between different operating systems. Typically in Linux or Mac they are located in /etc/hosts and on Windows they are located in %SystemRoot%\system32\drivers\etc\hosts
In order to be able to access the Raspberry Pi we add the following two lines to the end of our hosts file:
192.168.1.97  wordpress.pi
192.168.1.97  www.wordpress.pi
By adding these entries to our hosts file, we are mapping the domain wordpress.pi and www.wordpress.pi to the IP address of our Raspberry Pi.
If everything was set up correctly, we should be able to type http://www.wordpress.pi into a browser and see the Wordpress installation screen.
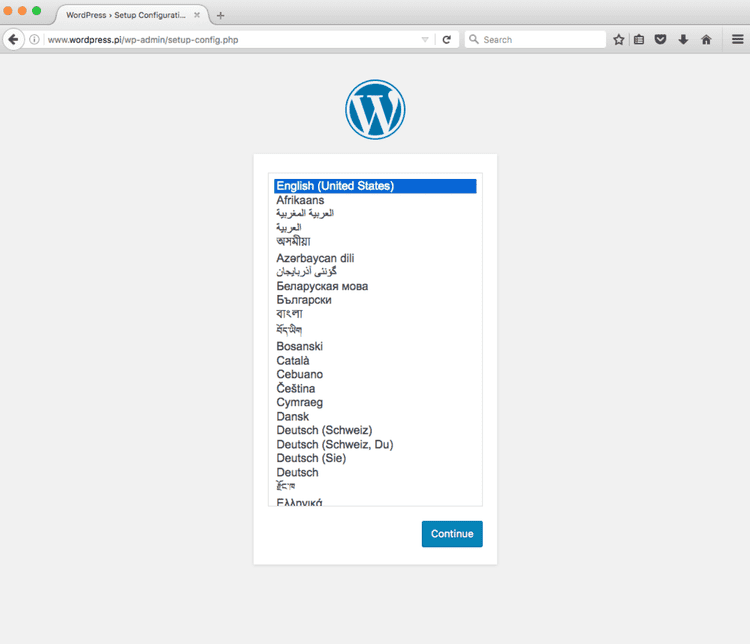
Follow the onscreen instruction on the configuration page to install Wordpress. We will need the root username and password of our MySQL server along with the name of the database we created.

The installation prompt should now ask for some additional information such as site title, admin username and password, etc. Finish entering these items and click Install Wordpress to finalize the install.
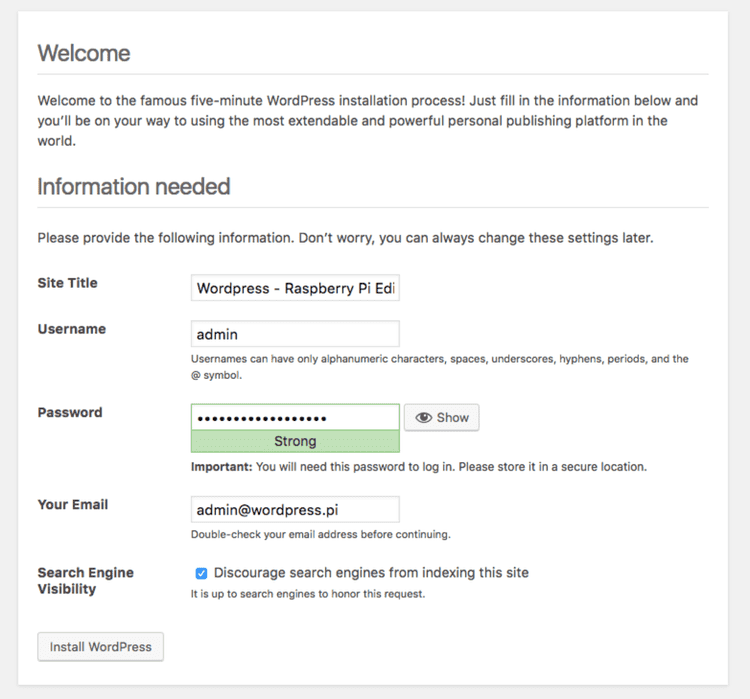
Once the installation has completed, it will take us directly to the dashboard. We now have a working Wordpress site running on the Raspberry Pi! To visit the site simply enterhttp://www.wordpress.pi into a browser.
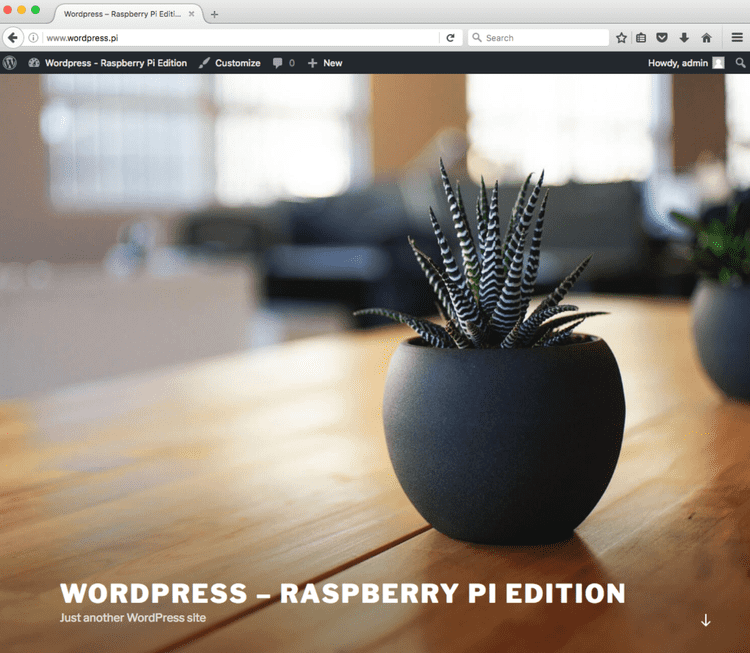
Setting up Apache and MySQL, for a basic Wordpress site, was an easy and straightforward process. In fact many of the steps can be automated with a simple script, making the task of spinning up a new site a breeze.
The site felt very responsive on my Raspberry Pi, considering I am using a class 4 Micro SD card. I did not notice any considerable slowdown and jank, while browsing or creating new posts. That’s not to say the performance won’t suffer for a larger site running multiple plugins.
For my next step, I plan on setting up a Node.js environment with MongoDB. I will also be testing how well a more complex Drupal 7 install runs on the Raspberry Pi. Eventually I want to set up an external USB storage as the primary drive for the Pi and see how well a more complex site performs.